Honey is one of nature's most remarkable preservatives, a substance so stable that archaeologists have discovered pots of it, still perfectly edible, in ancient Egyptian tombs. Yet, for all its longevity, honey undergoes a natural and often misunderstood transformation in our own pantries: crystallization.
This process, where liquid honey turns grainy and solid, is not a sign of spoilage but rather a testament to its purity and natural state. Many consumers, however, view this change with suspicion, mistakenly believing their honey has gone bad. The good news is that the process is entirely reversible. With a simple application of gentle heat, that solidified golden treasure can be restored to its smooth, liquid glory without degrading its delicate flavor and beneficial properties.
The science behind crystallization is fascinating and demystifies the phenomenon. Honey is a supersaturated sugar solution, primarily composed of two simple sugars: fructose and glucose. While fructose remains highly soluble, glucose has a lower solubility threshold. Over time, glucose molecules naturally separate from the water in the honey and begin to form stable, solid crystals. These crystals form a lattice that traps the other components, leading to the thick, spreadable consistency we associate with crystallized honey. Factors that accelerate this process include the ratio of glucose to fructose, the presence of pollen particles or beeswax that act as seed crystals, lower storage temperatures, and agitation. It is, in essence, a sign of raw, unprocessed honey. Mass-produced honeys that are heavily filtered and pasteurized often resist crystallization for much longer, but this processing can also strip away nuanced flavors and natural enzymes.
When the desire for liquid honey arises, the key to successful decrystallization is patience and the application of low, indirect heat. The goal is to gently warm the honey just enough to melt the glucose crystals back into solution, not to cook it. High, direct heat is the enemy; it can rapidly degrade the honey's quality, destroying delicate aromatic compounds, darkening its color, and breaking down enzymes that contribute to its unique character. The most effective and safest method to achieve this gentle warming is through a warm water bath. This technique allows for precise temperature control and even heat distribution, ensuring no part of the honey gets too hot.
The optimal temperature for this restorative process is right around 50°C (122°F). This temperature is a sweet spot—it is hot enough to efficiently dissolve the sugar crystals but remains well below the threshold that would cause significant damage to the honey's sensitive components. To begin, you will need a heat-safe container like a glass jar or a bowl that is larger than the container holding your honey. Fill this larger container with warm tap water, but do not place the honey in yet. The most crucial step is to check the water temperature with a kitchen thermometer. Adjust it by adding small amounts of hot or cool water until it consistently reads between 45°C and 50°C (113°F and 122°F). This ensures the environment is perfectly calibrated for the task ahead.
Once your water bath is at the ideal temperature, place the container of crystallized honey into it. It is vital that the water level outside is high enough to surround most of the honey level inside its container, but you must ensure the water cannot seep in and contaminate the honey if the lid is off. If the honey is in a sealed glass jar, you can loosen or remove the lid to prevent pressure buildup, but take care to keep the opening above the waterline. As the honey sits in the warm bath, the heat will slowly and evenly penetrate the crystals. Depending on the amount and degree of crystallization, this can take anywhere from fifteen minutes to over an hour. It is important to resist the urge to crank up the heat to speed things up. Periodically, you should remove the jar and stir the honey gently. This stirring helps redistribute the warmth, melting the crystals from the outside in, and provides a clear visual cue of your progress.
As you stir, you will feel the resistance lessen and see the opaque, solid honey transform back into a clear, viscous liquid. You may also need to refresh the water bath as it cools down, always replacing it with water at the same 50°C temperature to maintain a consistent and gentle heat source. Avoid using a microwave for this process. Microwaves heat unevenly, creating intense hot spots that can easily overheat and scorch sections of the honey while other parts remain solid. This method is unpredictable and almost guarantees some degree of quality loss. The slow, steady warmth of a water bath is the only reliable way to achieve a perfect restoration.
After the honey has returned to a completely liquid state, carefully remove it from the water bath. Dry the exterior of the container thoroughly to prevent any water from dripping into the honey when you open it. Before putting the lid back on, allow the honey to cool to room temperature. This final step helps preserve its quality for storage. Once decrystallized, you can store your honey at room temperature in a dark cupboard. It will likely crystallize again over time, as is its natural inclination, but you can repeat this gentle warming process as many times as needed without any ill effects, as long as the heat is always kept low and controlled.
Understanding and embracing the natural cycle of honey crystallization empowers us to be better consumers. Rather than discarding a perfectly good product or purchasing ultra-processed alternatives that never solidify, we can appreciate this characteristic as a hallmark of quality. The simple technique of using a warm water bath at 50°C is a bridge between modern convenience and respect for a ancient, natural food. It allows us to enjoy honey in both its liquid and creamed forms, knowing we can easily transition between the two while safeguarding the very essence that makes raw honey so special—its unparalleled flavor, aroma, and natural goodness.
In the quiet corners of every kitchen, a silent battle unfolds daily. It’s a fight against unseen invaders—bacteria, lingering odors, and the gradual wear of one of our most humble yet essential tools: the cutting board.
Whether it’s a sturdy wooden slab passed down through generations or a modern plastic variant, this kitchen workhorse endures countless chops, slices, and dices, absorbing juices, flavors, and, unfortunately, germs. Over time, even the most diligent scrubbing can fall short, leaving behind stubborn smells and potential health risks. But what if the solution to restoring its purity and extending its life was already sitting in your pantry, waiting for its moment in the sun?
Enter white vinegar and sunlight—a dynamic, natural duo that has been trusted for centuries in households worldwide. This isn’t some complex, chemical-laden regimen; it’s a return to simplicity, harnessing the power of nature to tackle kitchen hygiene. White vinegar, with its sharp, acidic tang, is more than just a salad dressing staple. It’s a potent antimicrobial agent, capable of breaking down grime and neutralizing odors without the harshness of synthetic disinfectants. And sunlight? It’s the original sanitizer, beaming down with ultraviolet rays that microbes simply can’t withstand. Together, they form a powerful, eco-friendly alliance that doesn’t just clean your cutting board—it revitalizes it.
Let’s start with the star of the show: white vinegar. Its magic lies in its acidity, primarily due to acetic acid, which typically makes up about 5-8% of its composition. This acidity is a formidable foe against common kitchen bacteria like E. coli, Salmonella, and Staphylococcus. When you spray or wipe white vinegar onto a cutting board surface, it penetrates microscopic crevices, disrupting the cell membranes of bacteria and effectively killing them. It’s a process that’s both gentle on your board and tough on germs. Unlike bleach or strong chemical cleaners, vinegar doesn’t leave behind toxic residues that could contaminate your food or damage the board’s material. Plus, it’s a champion at combating odors. Those persistent smells from garlic, onions, or fish? Vinegar neutralizes them by breaking down the alkaline compounds responsible, rather than just masking them with perfumes.
But vinegar alone isn’t the whole story. After its application, the cutting board needs its partner: the sun. Sunlight, particularly its ultraviolet (UV) component, is a natural disinfectant. UV rays damage the DNA and RNA of microorganisms, rendering them unable to reproduce or survive. This isn’t just folk wisdom; science backs it up. Studies have shown that UV radiation can significantly reduce microbial populations on surfaces. By placing your vinegar-treated board outside in direct sunlight, you’re giving it a one-two punch: first, the vinegar weakens and kills a portion of the bacteria and eliminates odors, then the UV rays finish the job, sterilizing the surface and ensuring any remaining pathogens are destroyed. The heat from the sun also helps to evaporate any residual moisture, which is crucial because dampness is a breeding ground for mold and mildew.
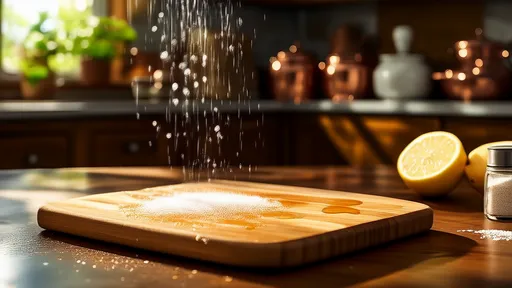
The process itself is beautifully straightforward. Begin by giving your cutting board a good rinse with warm water to remove any loose food particles. If there are stubborn stains or residues, a light scrub with a brush or sponge is advisable. Next, grab a spray bottle filled with undiluted white vinegar. Generously spritz the entire surface of the board, ensuring every inch is coated. Don’t forget the edges and handles, as these often harbor hidden germs. Let the vinegar sit for about 5-10 minutes; this dwell time allows the acid to work its antimicrobial magic. Then, without rinsing it off, take the board outside and place it in a spot where it will receive direct sunlight. Ideally, leave it for at least 2-3 hours, though longer exposure on a bright day will only enhance the effect. The combination of the vinegar and UV rays will work synergistically, leaving your board not just clean, but sanitized and refreshed.
Why does this method stand out compared to others? For one, it’s incredibly cost-effective. A bottle of white vinegar is inexpensive and has a long shelf life, making it a budget-friendly alternative to specialized cleaners. It’s also versatile; this same technique can be applied to other kitchen items like utensils, countertops, or even sinks. Environmentally, it’s a win. Vinegar is biodegradable and non-toxic, so you’re not introducing harmful chemicals into your home or the ecosystem. And for those with sensitivities or allergies, it’s a gentle option that avoids the harsh fumes and irritants found in many commercial products.
Moreover, this method is particularly kind to wooden cutting boards. Wood is porous, and harsh chemicals can break down its fibers over time, leading to cracking or warping. Vinegar, being mild, cleans effectively without causing damage. The sun’s drying action helps to pull moisture from deep within the wood, preventing swelling and rot. For plastic boards, while they are less porous, bacteria can still hide in knife scars. The vinegar-sunlight combo penetrates these tiny grooves, ensuring a thorough clean that scrubbing alone might miss.
Of course, it’s important to note that this method is a maintenance routine, not a replacement for proper washing with soap and water after each use. Think of it as a weekly or monthly deep-clean ritual to keep your board in peak condition. Also, be mindful of prolonged sun exposure for certain materials; while a few hours won’t harm most boards, leaving them out for days might cause fading or drying in some cases. Always check manufacturer guidelines if unsure.
In a world increasingly concerned with health and sustainability, turning to natural solutions like white vinegar and sunlight feels both wise and reassuring. It connects us to traditional practices that are effective, safe, and in harmony with nature. So the next time your cutting board tells tales of many meals past, remember: a simple spray and a sunny afternoon are all it takes to give it a new lease on life, ensuring it remains a trusted companion in your culinary adventures for years to come.
By /Aug 20, 2025
By /Aug 20, 2025
By /Aug 20, 2025
By /Aug 20, 2025
By /Aug 20, 2025
By /Aug 20, 2025
By /Aug 20, 2025
By /Aug 20, 2025